


1958–1964 Chevy X-Frame | Front Shock Relocation Kit
The X-Frame Front Shock Kit is engineered to provide the essential dampening needed for all 1958–1964 X-Frame Cars, Station Wagons, and El Caminos with aftermarket air suspension. When you replace your factory coil springs with air bags, the original shock—which sits vertically inside the coil—is permanently removed. Because the new mounting position is on the side of the control arm rather than through the center, a factory-style shock cannot be reused. Our kit includes specialized shocks designed for this specific exterior angle, ensuring that when you zip over a set of railroad tracks or catch an unexpected pothole, the shock dampens the bounce instantly for a smooth, controlled ride.
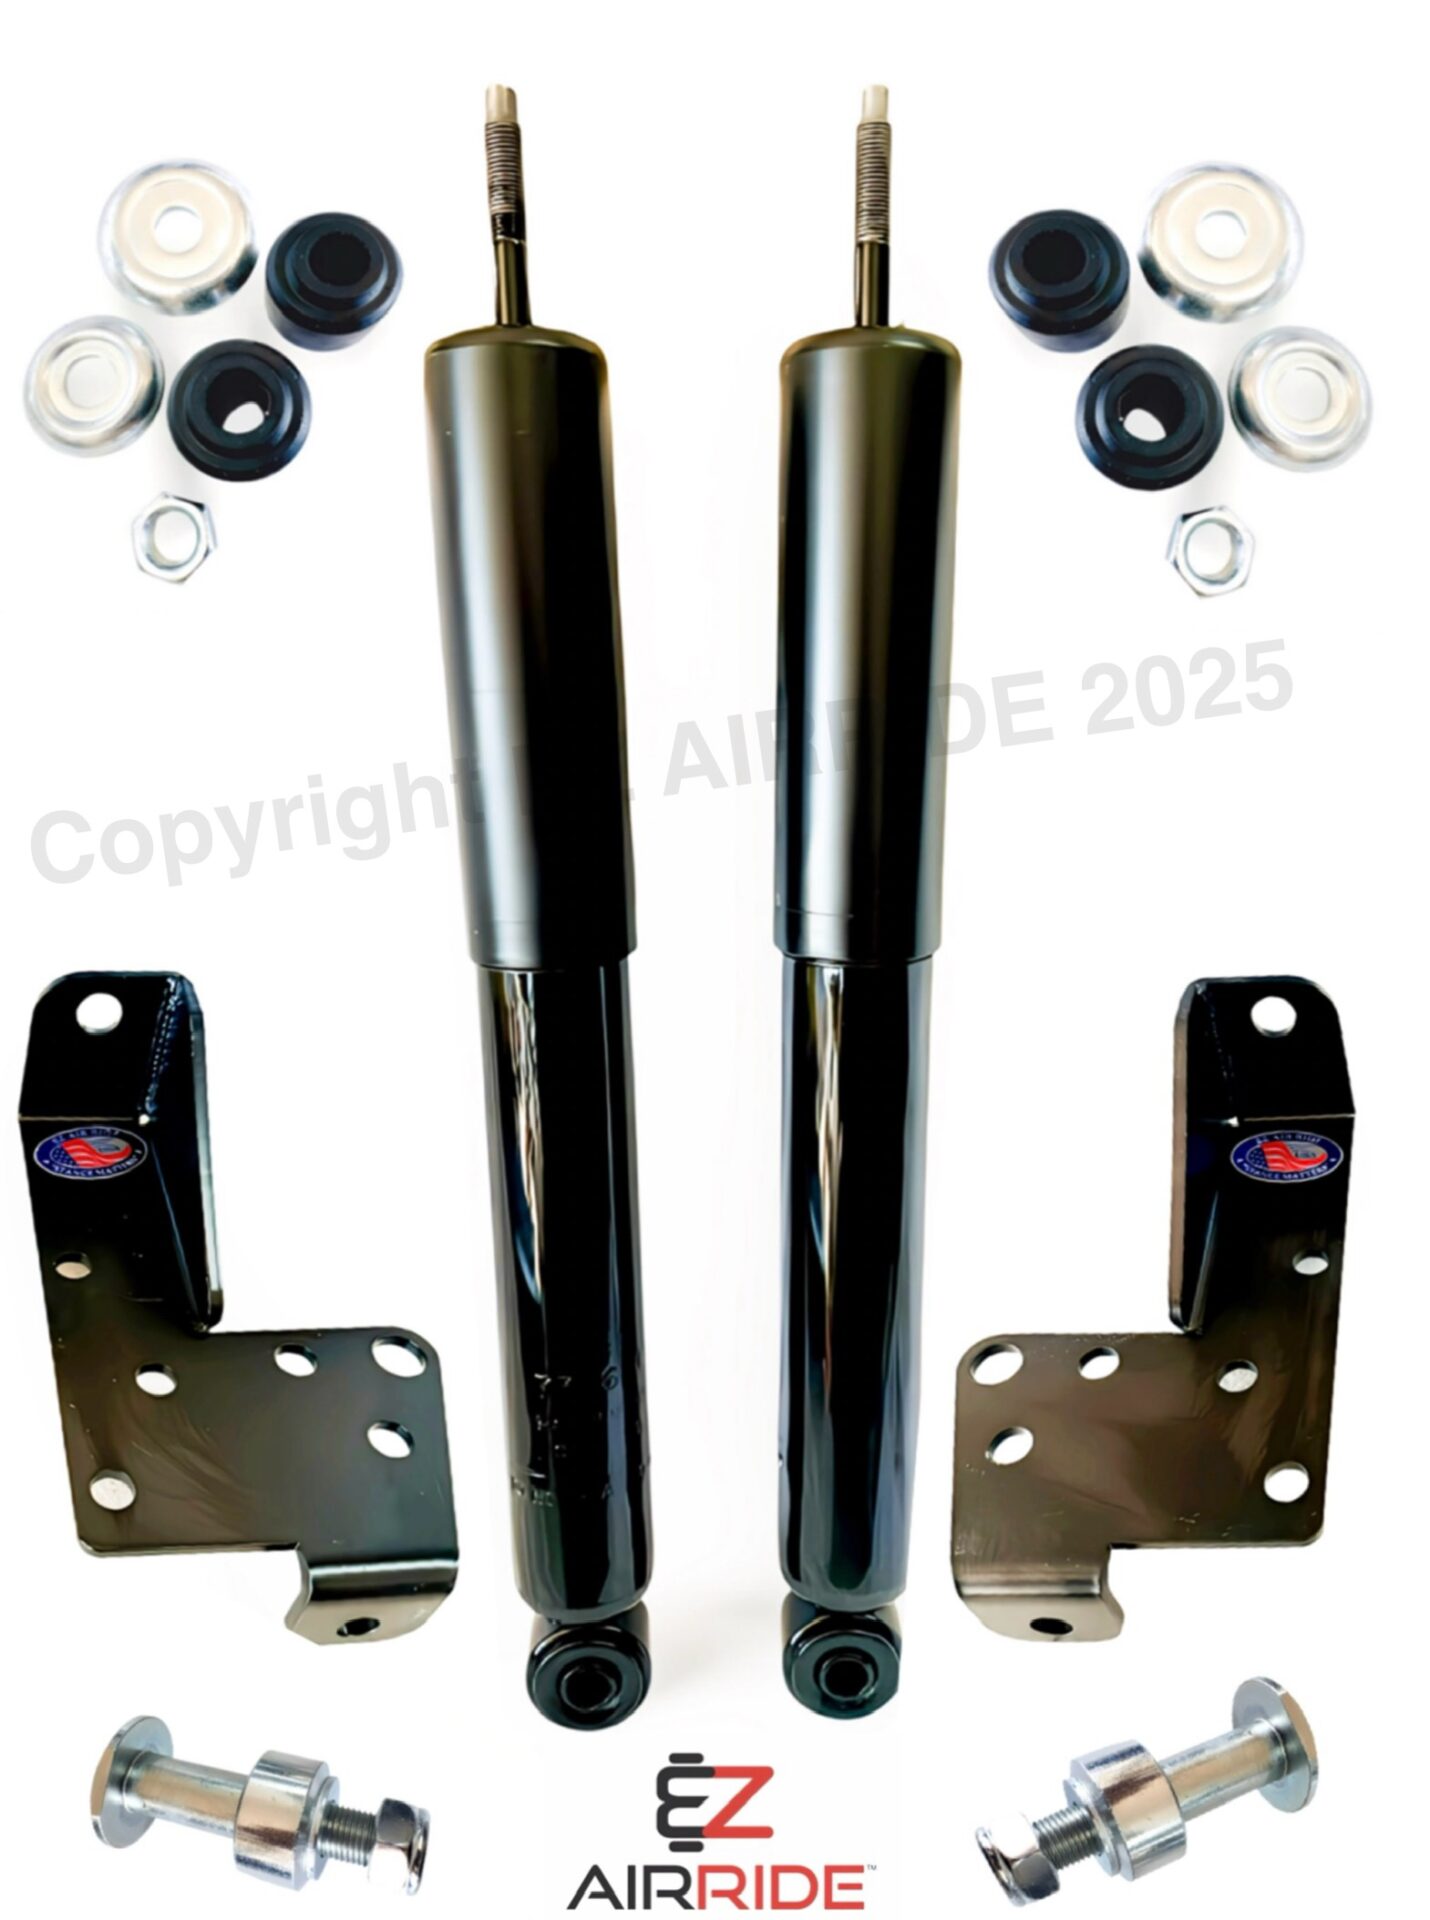
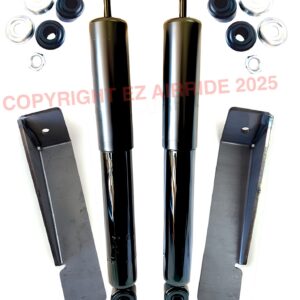
What’s in the Box:
- (2) Premium Shock Absorbers with Dust Covers
- (2) Weld-on Steel Upper Shock Towers
- (2) High-Tensile Stainless Steel Lower Control Arm Studs
- All necessary mounting hardware
Installation Overview:
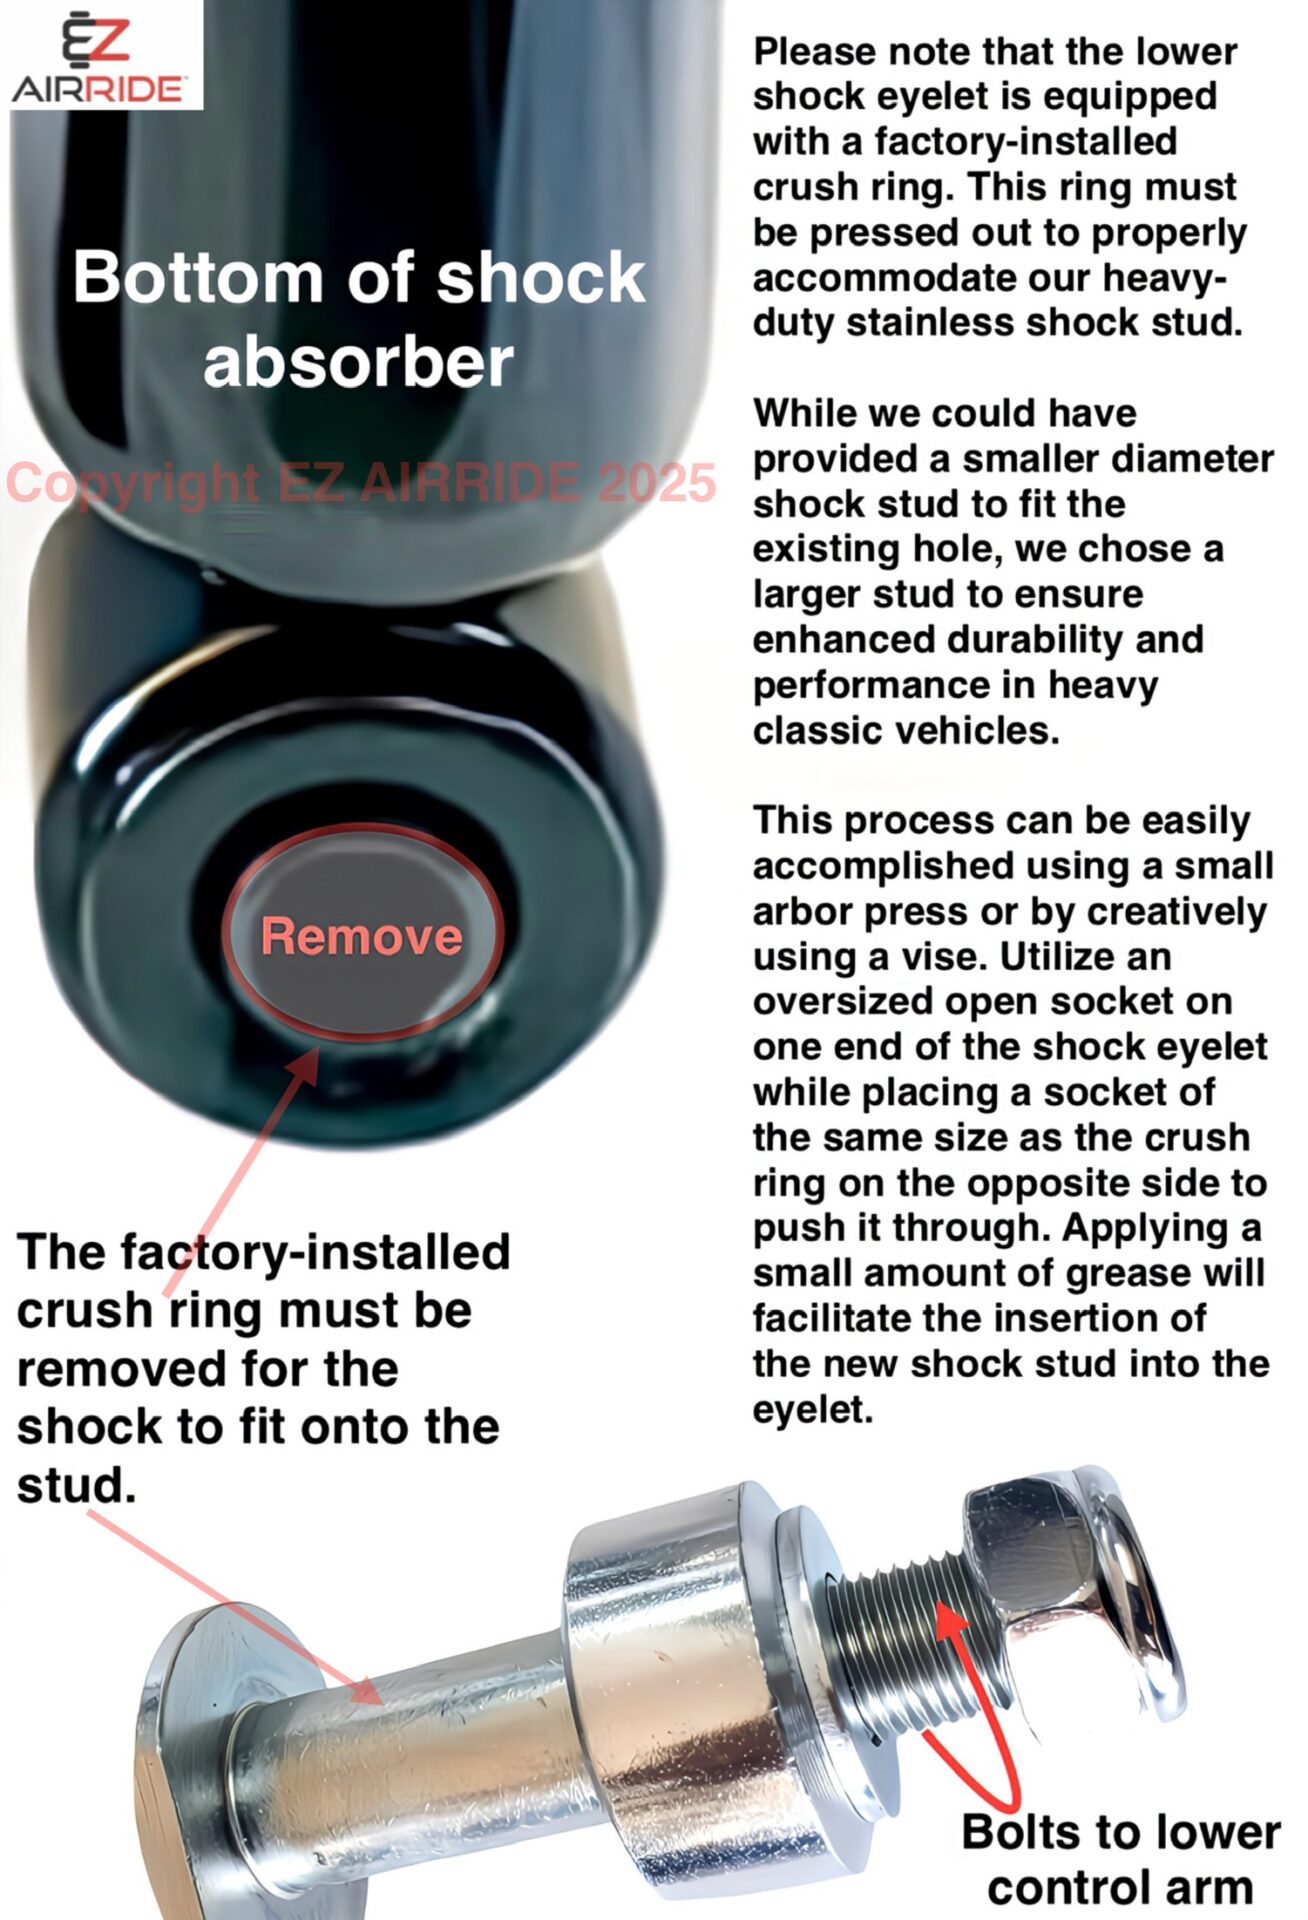
- Lower Mount: The stainless steel studs bolt directly to your factory lower control arms to secure the bottom of the shock. Since the 1958-1964 X-Frame is a front-steer vehicle, the shock will be positioned on the backside of the control arm (facing the firewall) for proper clearance.
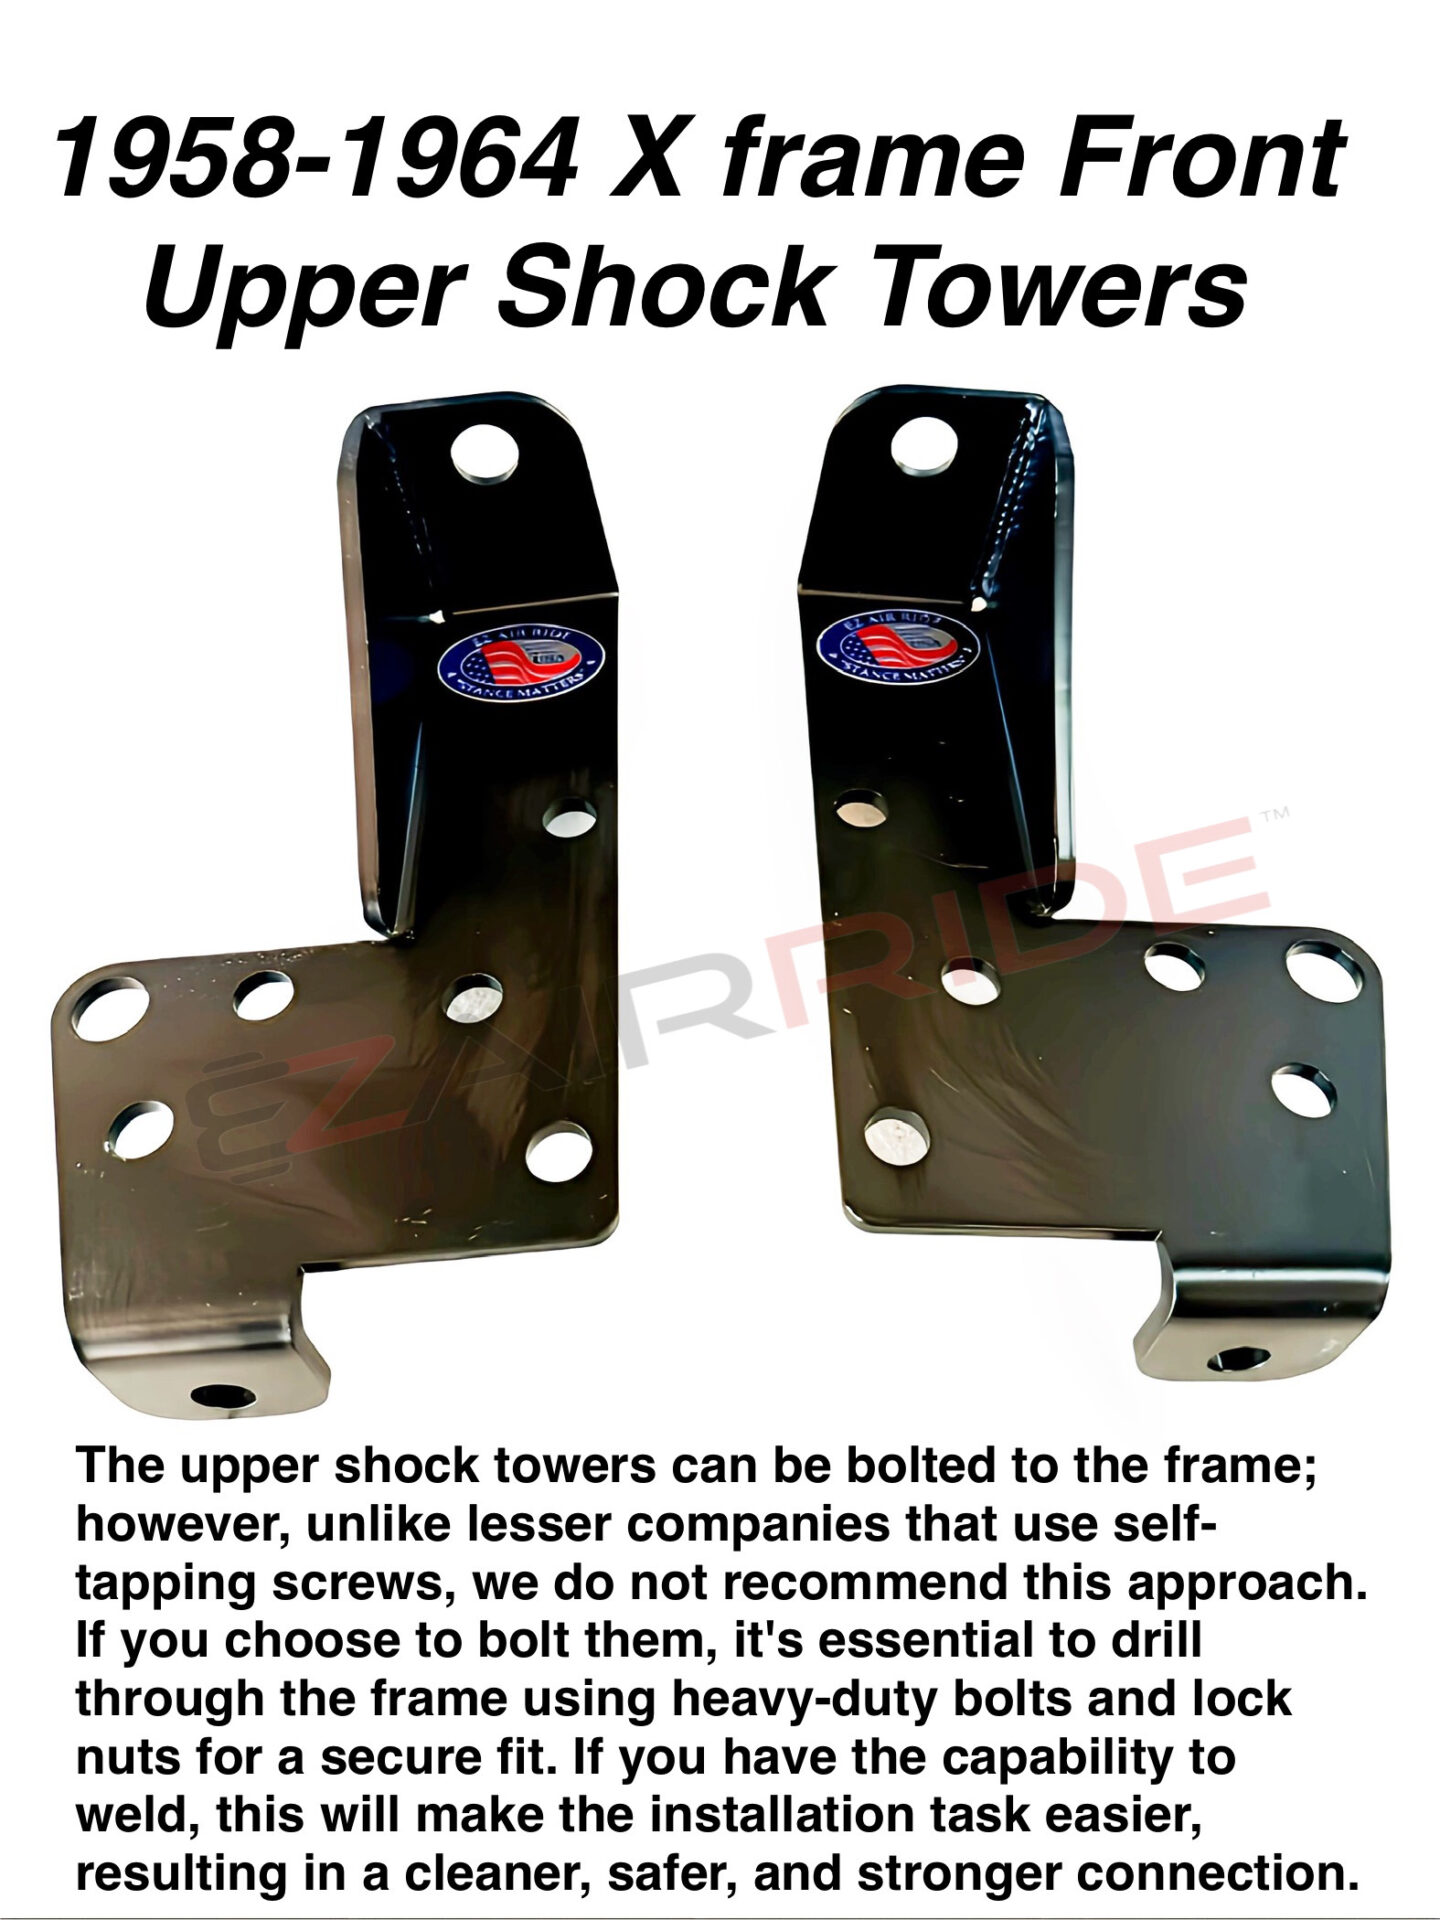
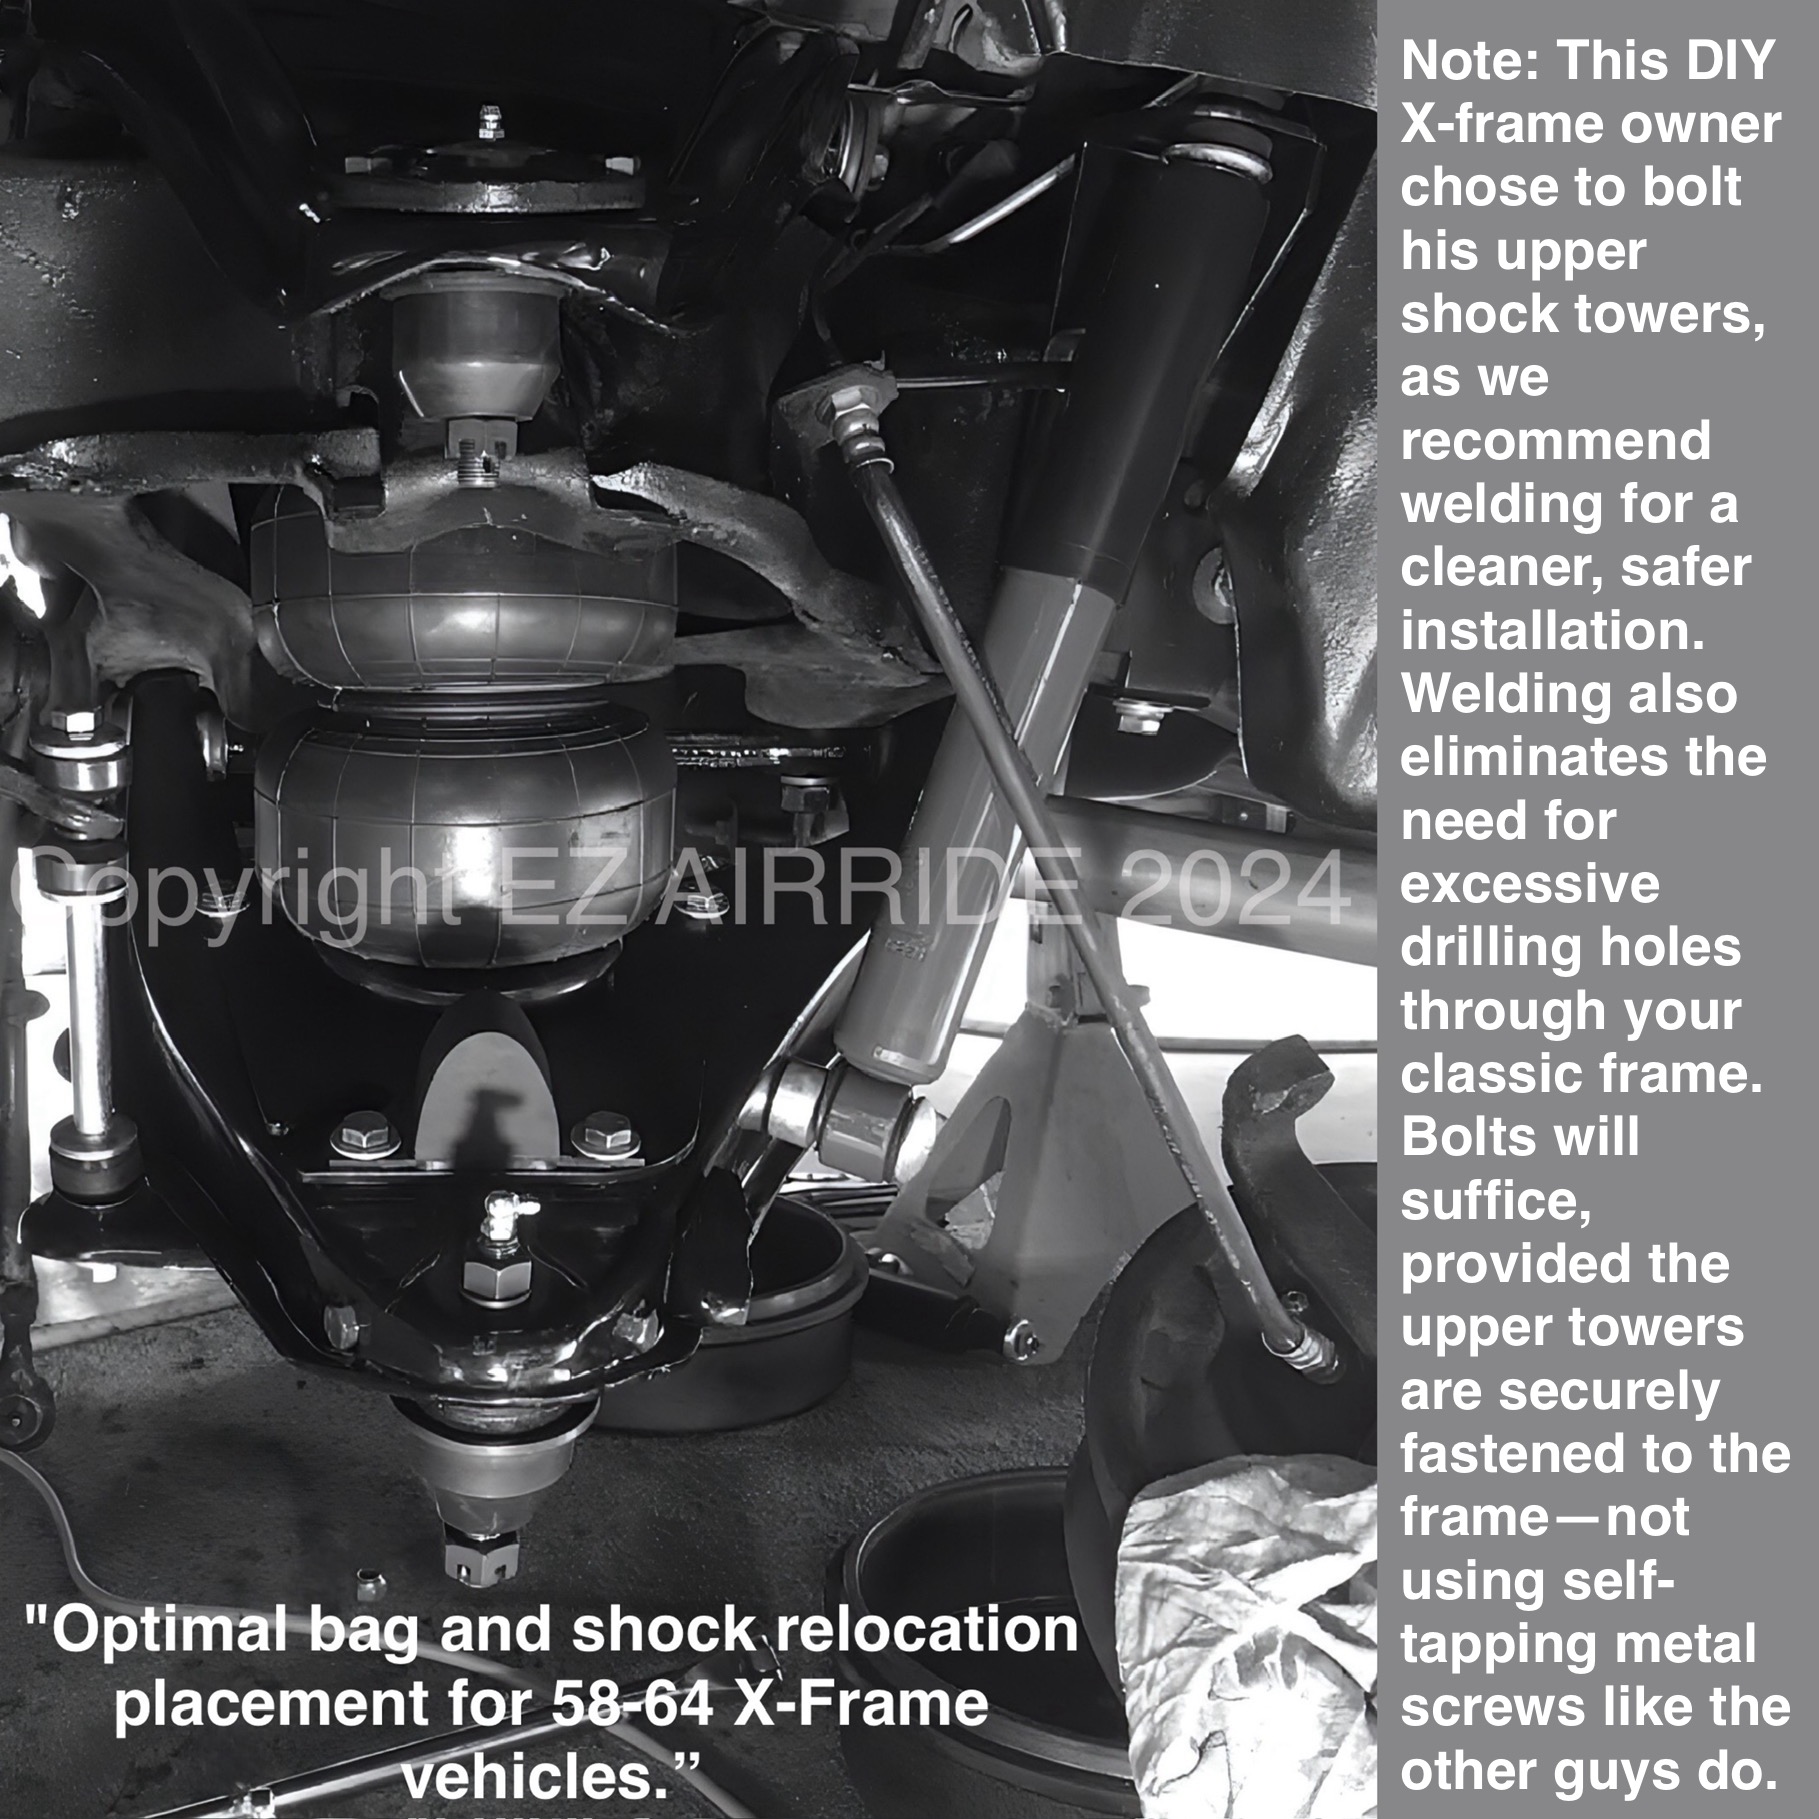
- Upper Mount: These towers are designed to be permanently fixed to the upper frame via welding. While our X-frame shock brackets include placement holes that—in theory—could be used for bolting, we strongly advise filling these holes with welds for a much stronger bond and a professional finish.
The “No-Welder” Alternative:
While it is technically possible to bolt these brackets using the provided placement holes, we do not recommend it. A bolt-on installation requires drilling multiple holes through your iconic Impala frame, which can compromise the structural integrity and aesthetic of the chassis. For a permanent, high-strength bond and a show-quality finish, welding is the only industry-recommended method.
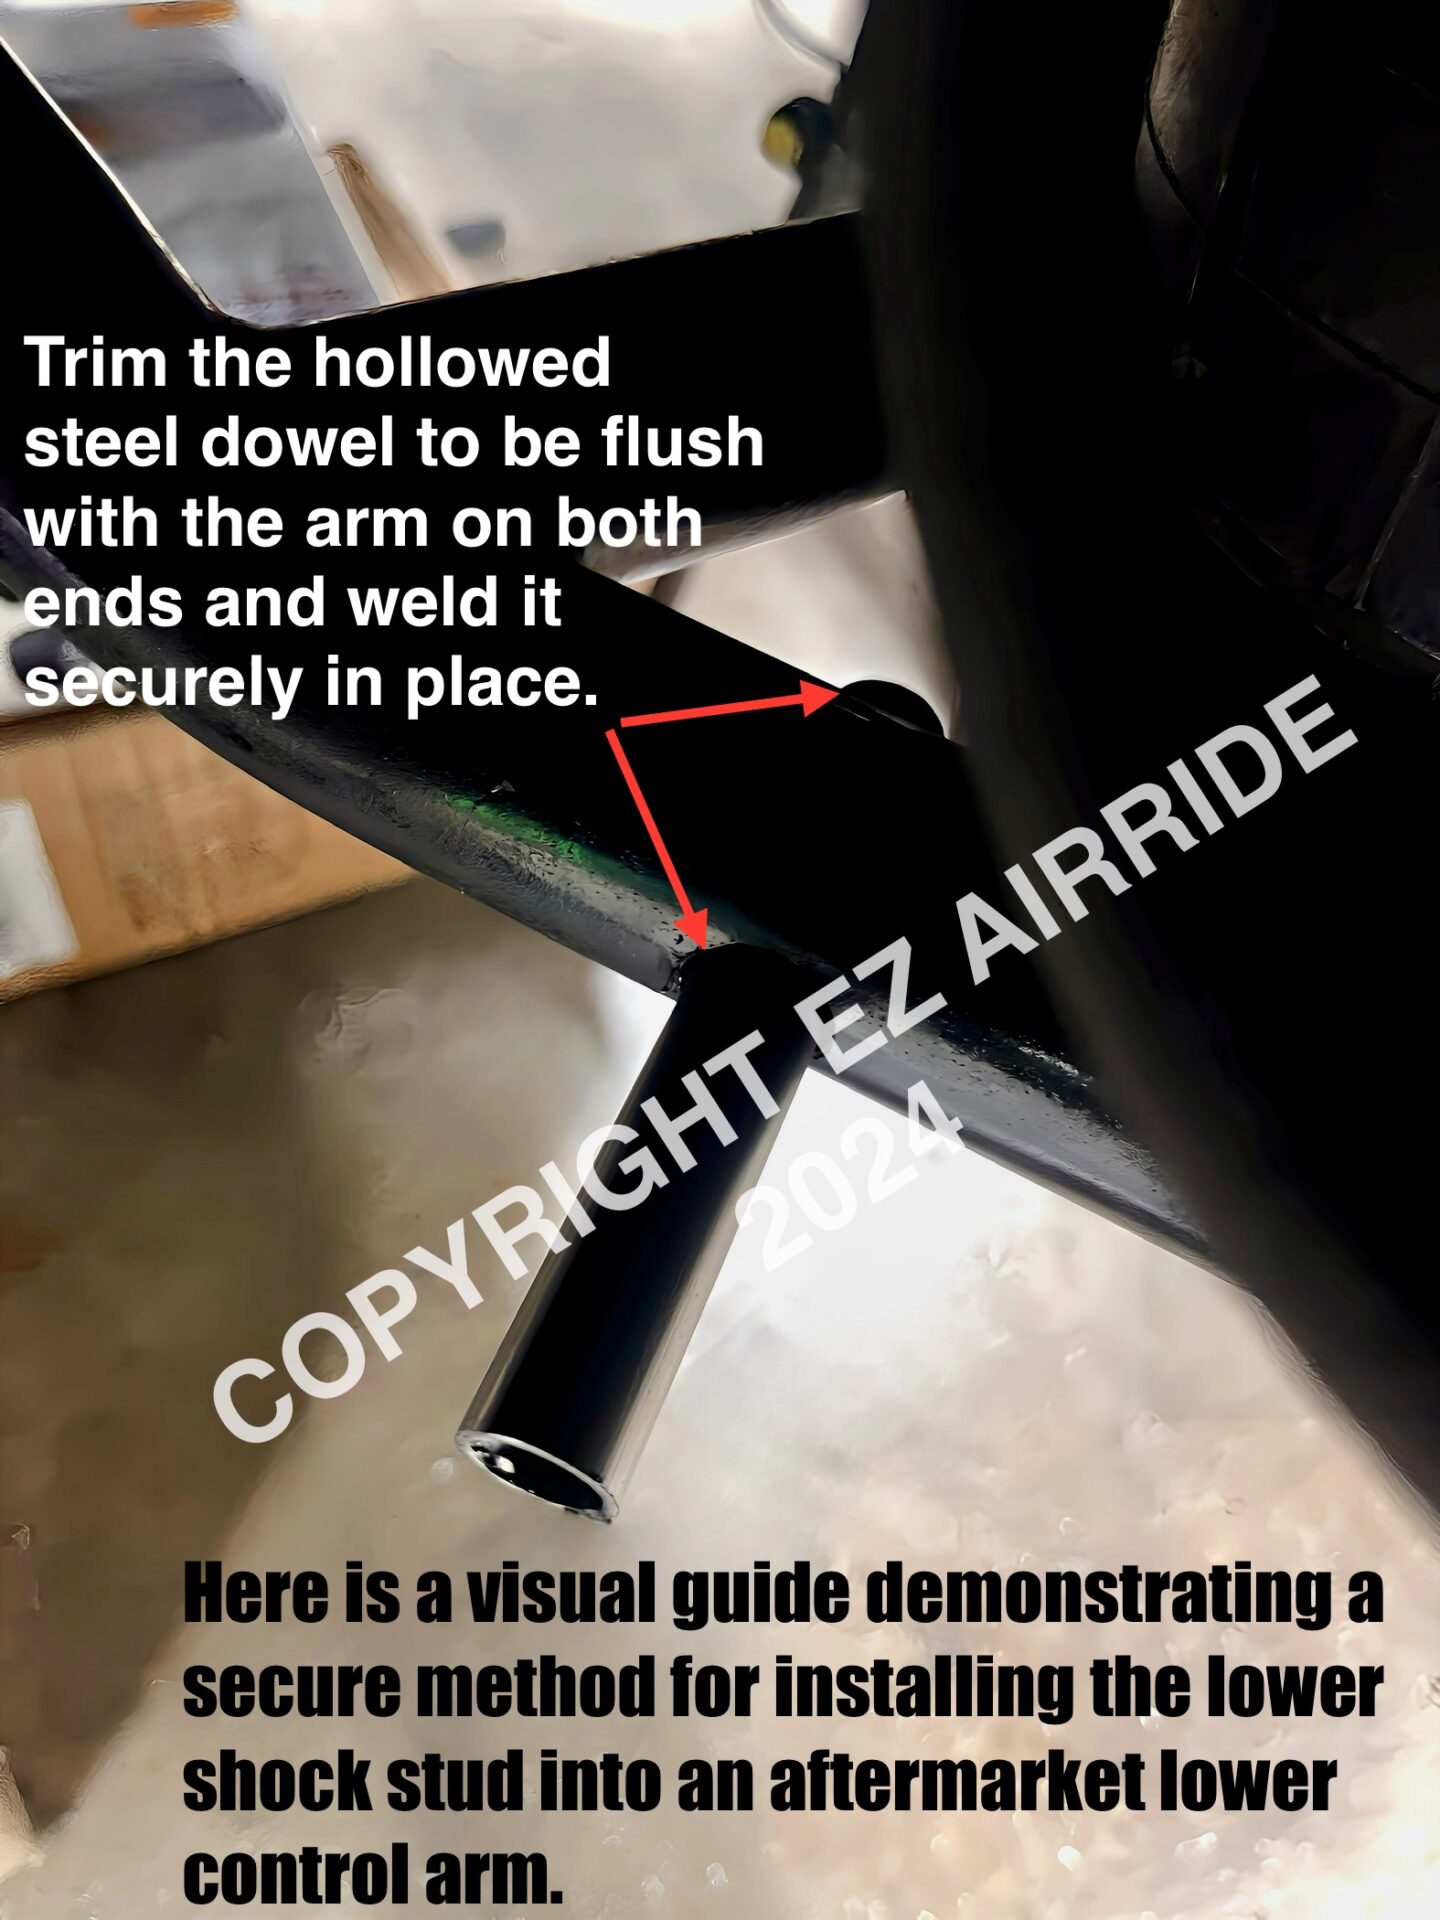
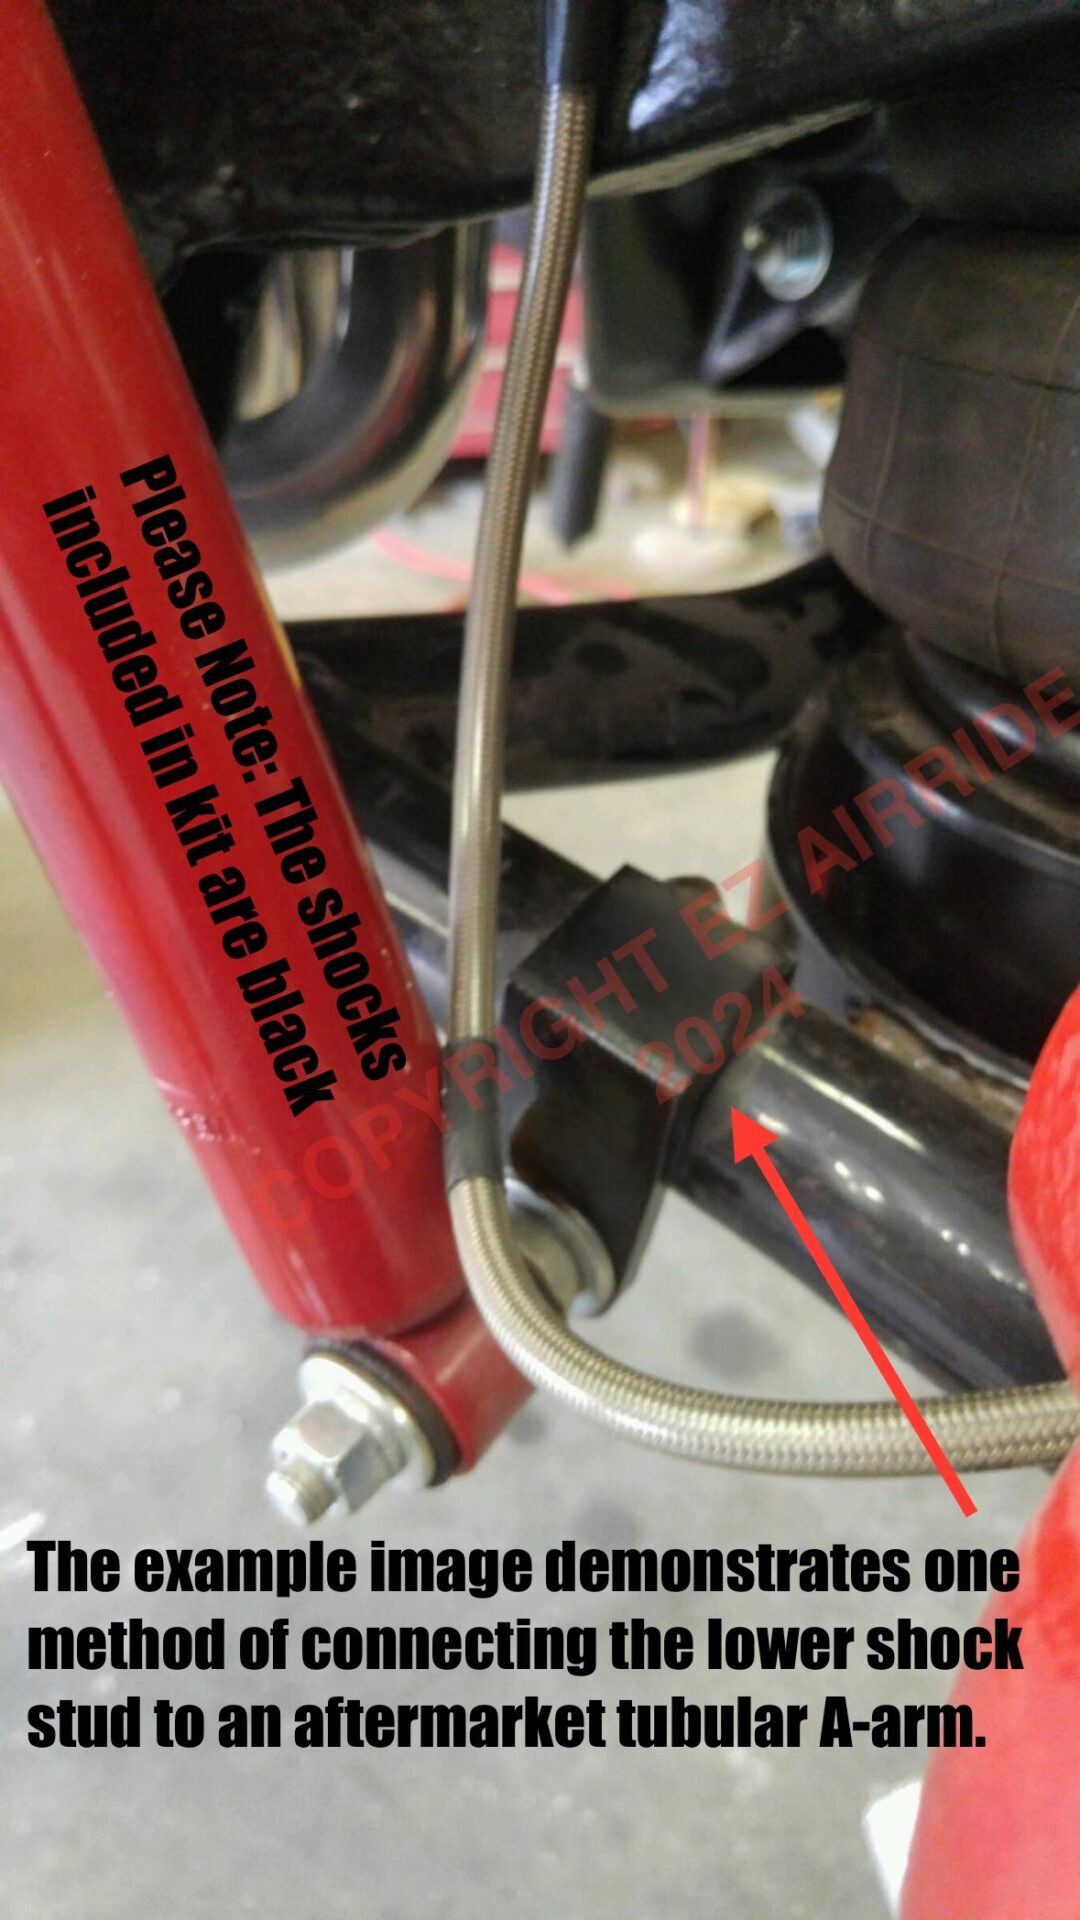
Important: Aftermarket Tubular Control Arms
If your vehicle is equipped with aftermarket tubular lower control arms- or if you are planning to install them- please be aware that the lower shock stud installation will require additional fabrication. While the stainless steel studs are a direct bolt-on for factory stamped-steel arms, tubular arms lack the necessary flat mounting surface and internal support.
Common Installation Methods for Tubular Arms:
- Through-Sleeve Method: This involves drilling a hole through the tubular arm and inserting a DOM (Drawn Over Mandrel) steel sleeve of the correct size to support the lower stud, which must then be welded in place.
- Tab Method: Alternatively, you can fabricate mounting tabs on the underside of the tubular arm to secure the shock stud.
Pro Tip – Consider Refurbishing Factory Arms:
If you haven’t purchased aftermarket arms yet, we highly recommend refurbishing your original factory arms. A fresh coat of paint and new ball joints will provide a cleaner, simpler installation. This approach saves you from the extra labor of grinding off new powder coating and performing structural welding on a brand-new set of arms—potentially saving you hundreds of dollars in shop labor. However, if your primary goal is the “show factor,” those tubular arms will certainly look impressive to the admirers who happen to be lying on the ground looking under your vehicle at a car show.
Final Installation Note: Measure Twice, Weld Once
Because every custom build is unique, a “dry fit” mockup is essential before final welding. Variations in rim height, wheel backspacing, aftermarket spindles, and upgraded brake kits can all influence the exact placement of your shock absorbers. It is essential to check your steering sweep from lock-to-lock to ensure no part of the wheel or braking system interferes with the shock.
To ensure a successful installation, we recommend the following pro-tips:
- Cycle the Suspension: Use a floor jack to cycle your suspension through its full range of motion. Turn the wheels lock-to-lock to confirm there is no interference with the shock at any steering angle.
- Check Full Compression: When the vehicle is fully “aired out” (laid down), the shock should not bottom out. We recommend maintaining at least a quarter-inch gap at full compression to prevent internal damage or mount failure.
- Clearance Check: Ensure your shock position provides a safe distance from factory sway bars, brake lines, and oversized wheels.
If you are a novice builder, consulting with a professional shop or a certified welder is highly advisable to ensure your shock relocation is safe, functional, and built to last.
Reviews
There are no reviews yet.